Two Wheels, One Loop: A Parent's Playbook for Campground Bike Life
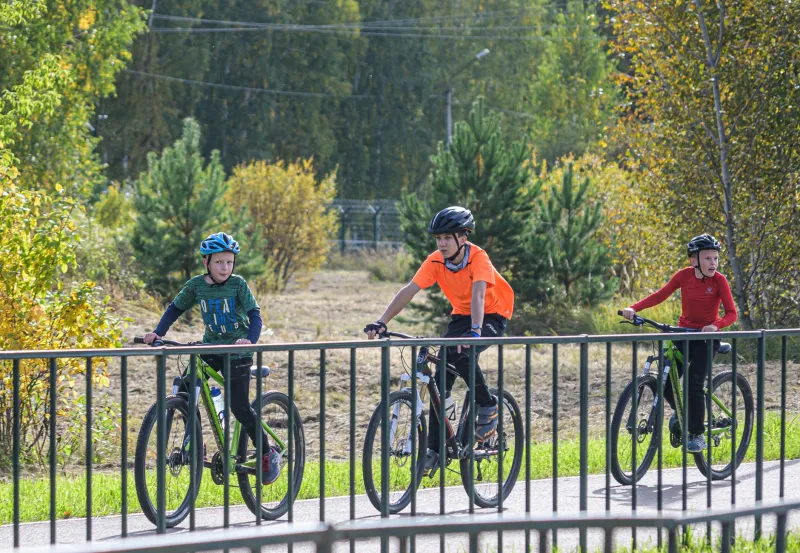
There's a moment on every family camping trip when the tents are up, the firewood is stacked, and the kids start orbiting the picnic table like satellites. That's the moment bikes earn their keep. A campground loop is a nearly perfect kid track: short, flat-ish, and full of small adventures. It's also a shared road with pedestrians, dogs, trucks, and someone's very important camp chair. A little planning turns wheeled chaos into the best hour of the day.
Start With the Right Wheels for the Age
Not every kid needs a geared mountain bike at the campground. Match the machine to the rider and the terrain, which is usually pavement, packed gravel, or a little of both.
- Ages 2 to 4: A balance bike is the MVP. Light, low to the ground, and easy to bail off. Skip the training wheels for now — balance comes first, pedaling later.
- Ages 4 to 6: A 14- to 16-inch pedal bike with a coaster brake or easy hand brakes. Keep it simple. A single speed is fine.
- Ages 7 to 10: A 20-inch bike with working hand brakes and maybe a few gears if your loop has hills. This is the age when kids start wanting independence, so make sure the brakes are legit.
- Ages 11 and up: Whatever they already ride at home, as long as it's tuned. Check tire pressure before you load it.
- Scooters: Great for short hops to the bathhouse or playground. Choose one with a rear fender brake and a deck wide enough for sneakers, not flip-flops.
Helmets are non-negotiable, and they need to fit. A loose helmet slides back on the head and protects the wrong part of the skull. Two fingers above the eyebrows, straps in a V under the ears, and one finger of space under the chin. Check for cracks or crushed foam before you pack a hand-me-down. If the helmet has been in a real crash, it's done.
The Loop Is a Shared Road, Not a Race Track
Kids hear "the loop" and think "track." It's our job to gently reframe that. The campground road is a shared space, and the smallest travelers get priority. Teach three rules before the first ride:
- Pedestrians win. Always. A kid on a bike yields to a person on foot, a person walking a dog, and anyone pushing a stroller.
- Stay right, pass left. Say "on your left" or ring a bell before passing. No buzzing people's elbows.
- Stop at every intersection. Even if they can see nothing coming. Cars back out of sites, and the campground store parking area is a magnet for distracted drivers.
If your campground has a one-way loop, ride it the right way even when it's empty. Muscle memory matters. And remind kids that campsites are not shortcuts. Cutting between sites is how you end up in someone's campfire ring or tangled in a clothesline.
Draw the Map Before the First Ride
A five-minute walk with the kids beats a twenty-minute lecture. Walk the route you're okay with them riding and point out the boundaries.
- Home base: Pick a visible landmark — your site number, a specific tree, the water spigot — and make it the official turnaround point.
- No-go zones: The dump station, the entrance road, the boat launch, and any site that isn't yours.
- The buddy rule: Kids under eight ride with an adult or an older sibling. Kids eight and up can pair up, but nobody rides solo unless you've agreed on it.
- Check-in times: If your kid is old enough for a little independence, set a return time and a meeting spot. A watch or a walkie-talkie works better than a phone that's almost dead.
Helmets, Lights, and the Five-Minute Check
Before every ride, run the quick ABC check: air in the tires, brakes that stop the bike, and chain that's on and moving freely. Add a helmet check and a shoe check — closed-toe sneakers only, especially for scooters.
If your kids will be riding near dusk, add lights. A small front light and a rear blinky light make a kid visible to drivers backing out of sites. Bright shirts help, too. And a bell isn't a toy; it's a courtesy tool. Teach kids to use it early and often.
Independence With a Tether
The goal isn't to hover. It's to give kids a taste of freedom inside a boundary they understand. For younger riders, that means you're nearby but not narrating every move. For older kids, it means check-ins and clear rules about where the loop ends and the wider campground begins.
A few practical moves:
- Ride the route with them first. Then let them ride it while you watch from the site.
- Use a visible marker. A bright bandana on a handlebar or a specific-colored helmet makes your kid easy to spot.
- Agree on a turnaround. "Ride to the stop sign and come back" is clearer than "don't go too far."
- Keep the bike parked at your site, not in the road. Lean it against a picnic table or use a small kickstand plate so it doesn't sink into soft ground.
When the Loop Gets Crowded
Mid-morning and late afternoon are peak bike times. If the loop is packed, shift to a paved path, the playground, or a game of bike-free tag. Rainy days are a good time to practice helmet fit and brake checks under the canopy. And if your kid is melting down, call it. A tired kid on a bike is a wobbly kid on a bike.
Wheeled fun works best when it's simple: the right bike, a helmet that fits, a boundary that makes sense, and a grown-up who trusts the plan. Do that, and the loop becomes the part of the trip your kids talk about on the drive home.